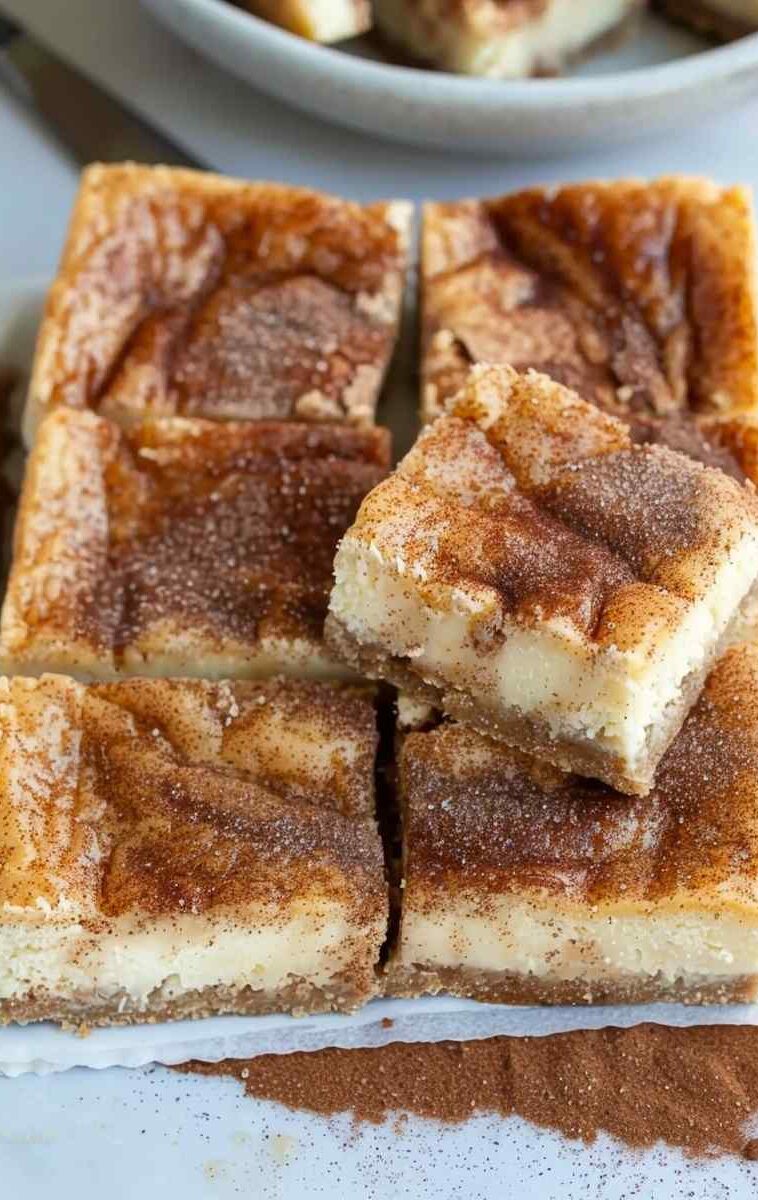
Snickerdoodle Cheesecake Bars combine the beloved flavors of classic snickerdoodle cookies with rich and creamy cheesecake, creating a decadent dessert that is sure to impress. These bars feature a buttery graham cracker crust, a creamy cheesecake filling infused with cinnamon, and a sweet cinnamon sugar topping. Whether enjoyed as a treat for yourself or shared with friends and family, these bars are guaranteed to be a hit.
Why Make Snickerdoodle Cheesecake Bars
Snickerdoodle Cheesecake Bars offer the best of both worlds: the creamy richness of cheesecake and the warm spiciness of snickerdoodle cookies. This recipe provides a convenient way to enjoy these classic flavors in bar form, making them perfect for gatherings, potlucks, or simply indulging at home. With simple ingredients and easy preparation, these bars are a delicious dessert option for any occasion.
How to Make Snickerdoodle Cheesecake Bars
- Prepare Crust:
- Mix graham cracker crumbs, sugar, and melted butter until well combined.
- Press the mixture evenly into the bottom of a parchment-lined baking dish.
- Make Cheesecake Filling:
- Beat together cream cheese, sour cream, sugar, flour, vanilla extract, and cinnamon until smooth.
- Add eggs one at a time, beating well after each addition.
- Prepare Cinnamon Sugar:
- Combine granulated sugar and ground cinnamon in a small bowl.
- Assemble Bars:
- Pour half of the cheesecake filling over the crust.
- Sprinkle half of the cinnamon sugar mixture over the filling.
- Pour the remaining cheesecake filling over the cinnamon sugar layer.
- Sprinkle the remaining cinnamon sugar mixture on top.
- Bake:
- Bake the bars until the center is set with only a slight jiggle.
- Cool and Chill:
- Let the bars cool to room temperature, then chill in the refrigerator for at least 2 hours or overnight.
- Serve:
- Once chilled, cut into squares and serve as desired.
Serving Suggestions
Serve Snickerdoodle Cheesecake Bars chilled, either as a standalone dessert or with a dollop of whipped cream or a scoop of vanilla ice cream for extra indulgence. These bars are perfect for parties, holidays, or any special occasion. Garnish with a sprinkle of ground cinnamon or cinnamon sticks for a decorative touch.
Storage Info
Store any leftover Snickerdoodle Cheesecake Bars in an airtight container in the refrigerator for up to 5 days. For longer storage, wrap the bars tightly in plastic wrap and aluminum foil before freezing for up to 1 month. Thaw in the refrigerator before serving, allowing them to come to room temperature for the best texture and flavor.
Some Techniques or Tips
- Ensure all ingredients for the cheesecake filling are at room temperature to prevent lumps and achieve a smooth texture.
- Use a food processor or blender to crush graham crackers into fine crumbs for the crust.
- For cleaner cuts, chill the bars thoroughly before slicing with a sharp knife dipped in hot water and wiped clean between cuts.
Variation
Experiment with different crust options by using crushed snickerdoodle cookies or vanilla wafer crumbs instead of graham crackers. You can also add a swirl of cinnamon or caramel sauce to the cheesecake filling for extra flavor. For a festive twist, sprinkle crushed cinnamon candies or festive sprinkles on top before baking.
FAQs about Snickerdoodle Cheesecake Bars
- Can I use low-fat cream cheese or sour cream for this recipe?
- Yes, you can use low-fat or reduced-fat cream cheese and sour cream if desired. However, keep in mind that this may affect the texture and richness of the bars slightly.
- Can I make these bars gluten-free?
- Yes, you can make gluten-free Snickerdoodle Cheesecake Bars by using gluten-free graham crackers or cookie crumbs for the crust and ensuring all other ingredients are gluten-free.
- Can I use a different size baking dish for this recipe?
- Yes, you can use a different size baking dish, but be aware that the thickness of the bars and baking time may vary. Adjust accordingly and keep an eye on the bars as they bake to prevent overcooking.
For ingredients and comprehensive cooking instructions, please proceed to the next page or click the open button (>)—and be sure to share with your Facebook friends!


GIPHY App Key not set. Please check settings