Strawberry Oreo Cheesecake Balls
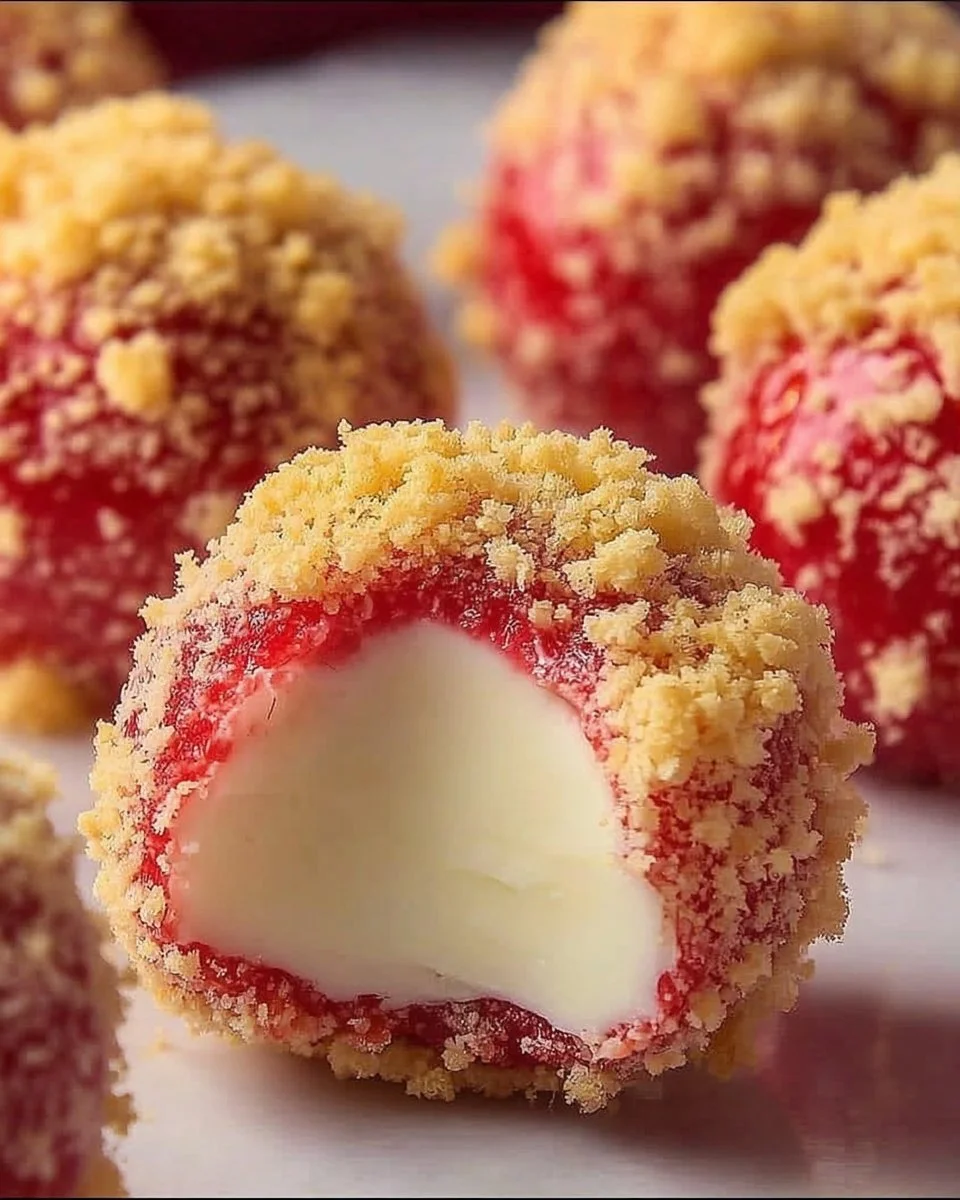

Indulge in Strawberry Oreo Cheesecake Balls
There’s nothing quite like the sweet and creamy combination of cheesecake and chocolatey crunch, especially when strawberries are involved. Having made these delightful Strawberry Oreo Cheesecake Balls countless times, I can assure you they are an absolute crowd-pleaser. Perfect for parties, picnics, or just a sweet treat at home, these little bites of joy combine the rich flavor of cheesecake with the nostalgic taste of Golden Oreos and a burst of strawberry.
What Makes This Recipe Special
Why should you dive into making these Strawberry Oreo Cheesecake Balls? Let me tell you! These treats are not only incredibly easy to whip up but are also a budget-friendly way to impress your friends and family. The combination of creamy cheesecake and crunchy Golden Oreos brings a unique fun twist that’s sure to be a hit. Serve them during a casual family gathering or celebrate a special occasion; their versatility shines in any setting!
“These Strawberry Oreo Cheesecake Balls were a huge hit at our family barbecue! Everyone loved the creamy filling and that special crunch from the Oreos. I’ll definitely be making them again!” – Sarah J.
The Cooking Process Explained
Making these Strawberry Oreo Cheesecake Balls is a breeze! You’ll start by preparing your cookie crust, then whip up that luscious cream cheese filling, and finally assemble the treats before chilling them to perfection. Here’s a quick overview of the steps involved:
- Create a cookie crust mixture using crushed Golden Oreos and strawberry gelatin.
- Beat the cream cheese until fluffy and combine it with sugar and vanilla.
- Whip heavy cream and fold it gently into the cream cheese mixture to maintain a light and airy texture.
- Shape the mixture into bite-sized balls, chill, and roll them in the crunchy coating.
What You’ll Need


To recreate this delightful recipe, gather the following ingredients:
- Cream cheese, softened
- Powdered sugar, sifted
- Vanilla extract
- Heavy whipping cream, chilled
- Golden Oreos, crushed
- Strawberry gelatin powder
- Melted butter
Feel free to adjust as necessary, like opting for low-fat cream cheese or a sugar substitute if you’re watching your sugar intake!
Step-by-Step Instructions
Now, let’s get into the cooking:
Prepare the Oreo Mixture: In a mixing bowl, combine 1 ½ cups of crushed Golden Oreos with 2 tablespoons of strawberry gelatin powder. Stir in 4 tablespoons of melted butter and use a fork to mix until the texture resembles wet sand, clumping together.
Make the Cream Cheese Mixture: In a large bowl, beat 8 ounces of softened cream cheese until it’s fluffy and light. Mix in 1 teaspoon of vanilla extract and 1 cup of sifted powdered sugar until there are no lumps.
Whip the Cream: In a separate chilled bowl, whip 1 cup of cold heavy cream using a hand mixer until stiff peaks form.
Combine Mixtures: Carefully fold the whipped cream into the cream cheese mixture using broad, sweeping motions, being careful not to overmix.
Form the Balls: Use a cookie scoop or your hands to scoop out bite-sized balls. Place them on a lined baking sheet.
Chill: Freeze the balls for 20-30 minutes, allowing them to firm up.
Coat: Roll each cheesecake ball in the Oreo mixture to coat evenly, gently pressing the coating to ensure it sticks. Return them to the baking sheet.
Best Ways to Enjoy It
Once you’ve made these delightful little cheesecake balls, the fun has just begun! Serve them chilled on a platter for a striking presentation. You might even consider pairing them with fresh strawberries or a drizzle of chocolate sauce for an added touch of decadence. A nice cup of coffee or a dollop of whipped cream would make fantastic companions as well!
Keeping Leftovers Fresh
If you have any delicious leftovers, store them in an airtight container in the refrigerator for up to 5 days. You can also freeze them for longer storage, allowing up to 2 months. To enjoy frozen treats, simply remove them from the freezer and let them sit at room temperature for a few minutes before indulging.
Extra Advice
To ensure your cheesecake balls are a success, here are a few tips:
- Make sure your cream cheese is softened to room temperature for the easiest mixing.
- Don’t overmix the whipped cream into the cream cheese mixture; maintaining that light, airy texture is key.
- Experiment with different flavored gelatin powders or crushed cookies for your own unique variations!
Creative Twists
Feel adventurous? Here are a few variations you can try:
- Replace Golden Oreos with classic chocolate Oreos for a richer flavor.
- Substitute strawberry gelatin with raspberry or blueberry for a berry burst!
- Drizzle the finished cake balls with white chocolate for an elegant touch.
Your Questions Answered
How long do these cheesecake balls take to make?
The entire process takes about 45 minutes, plus additional chilling time.
Can I use fat-free cream cheese?
Absolutely! Fat-free cream cheese can be used, though it may affect the texture slightly.
Are these cheesecake balls safe to freeze?
Yes, they freeze well! Just ensure they are stored in an airtight container.
These Strawberry Oreo Cheesecake Balls are not just a recipe; they’re a delicious experience waiting to happen. So roll up your sleeves and enjoy the sweet journey of flavors and textures!

Strawberry Oreo Cheesecake Balls
Ingredients
Method
- In a mixing bowl, combine 1 ½ cups of crushed Golden Oreos with 2 tablespoons of strawberry gelatin powder. Stir in 4 tablespoons of melted butter until it resembles wet sand.
- In a large bowl, beat 8 ounces of softened cream cheese until fluffy. Mix in 1 teaspoon of vanilla extract and 1 cup of sifted powdered sugar until smooth.
- In a separate bowl, whip 1 cup of cold heavy cream until stiff peaks form.
- Gently fold the whipped cream into the cream cheese mixture without overmixing.
- Scoop out bite-sized balls using a cookie scoop or your hands and place them on a lined baking sheet.
- Freeze the balls for 20-30 minutes to firm up.
- Roll each cheesecake ball in the Oreo mixture, pressing gently to ensure it sticks. Return to the baking sheet.



I have a question , when you use Oreos in a recipe, do you just use the cookie part and throw away the white part?
The recipe says to return the balls to the baking sheet, but then it says no more. What happens next? Back to the freezer?? How do you get the gelatin around the balls?? There is a lot no explained in this recipe. I want to make it, but after some answers…..