 By Natalie
In this recipe
An Irresistible Crunch: Homemade Chickpea Seed Crackers
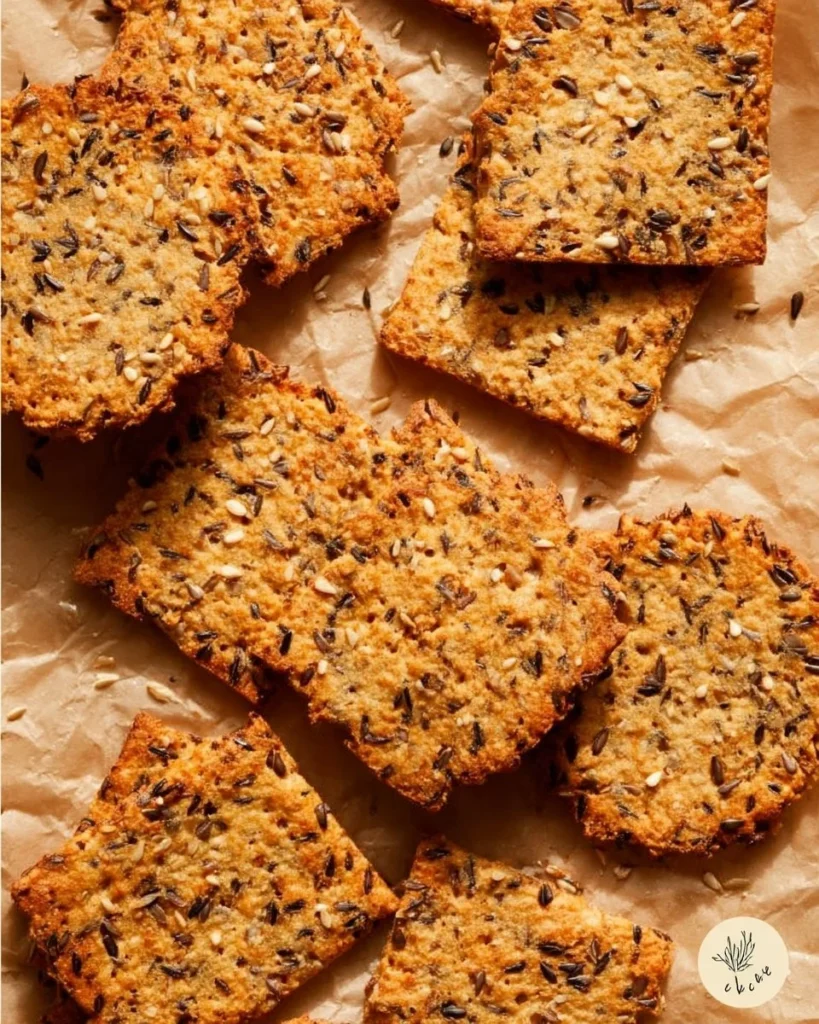
When I first tried making these homemade chickpea seed crackers, I was pleasantly surprised by how simple yet rewarding the process was. Perfectly crunchy, healthy, and packed with flavor, these crackers are a delightful snack for any occasion. Whether you’re looking for a quick afternoon nibble, a fun appetizer for a gathering, or a wholesome addition to your lunchbox, this recipe offers a delicious and nutritious option that just might become a staple in your kitchen.
Reasons to Try It
You’ll love these crackers for a multitude of reasons. First, they are incredibly budget-friendly—using just a few pantry staples while delivering rich flavors and textures. They’re also gluten-free and make for a fantastic healthy snack, especially for kids who often favor crunch over whimsy. Imagine whipping these up on a busy weekday, allowing the delightful aroma to fill your kitchen, or making a batch for a family brunch where they can hold their own next to a spread of cheese and dips.
“These chickpea seed crackers are a game-changer! I can’t believe how easy they are to make, and my kids love them.” — Jessica T., satisfied home cook.
Preparing Homemade Chickpea Seed Crackers
Creating homemade chickpea seed crackers is a straightforward and satisfying process. You’ll start by mixing your dry ingredients, then add in the liquids to form your dough. Once mixed, you’ll spread out the dough onto a baking sheet, let it bake until crispy, and then cool before serving. It’s a great way to get familiar with working with chickpea flour, which is not only nutritious but adds a wonderful nutty flavor.
What You’ll Need
To get started, here’s the list of ingredients that will bring your chickpea seed crackers to life:
- 1 cup chickpea flour
- 1/4 cup sunflower seeds
- 1/4 cup sesame seeds
- 1/4 cup pumpkin seeds
- 1/2 teaspoon salt
- 1/2 teaspoon garlic powder
- 1/2 cup water
- 1 tablespoon olive oil
Feel free to swap sunflower seeds with your favorite nuts or seeds to mix things up!
Step-by-Step Instructions
Follow these directions to whip up your delicious homemade crackers:
- Preheat your oven to 350°F (175°C).
- In a large mixing bowl, combine the chickpea flour, sunflower seeds, sesame seeds, pumpkin seeds, salt, and garlic powder.
- Gradually add the water and olive oil while mixing until a dough forms.
- Spread the mixture evenly onto a baking sheet lined with parchment paper, pressing down to create a thin layer.
- Bake for 20-25 minutes or until the crackers turn golden brown and crispy.
- Allow them to cool before breaking into pieces. Enjoy your homemade chickpea seed crackers!
Best Ways to Enjoy It
These chickpea seed crackers can be enjoyed in various creative ways! Serve them with hummus, guacamole, or a flavorful yogurt dip. Pair them with cheese or charcuterie boards for an impressive appetizer that will surely wow your guests. Crumble them over salads for a delightful crunch, or enjoy them straight from the container as a healthy on-the-go snack!
Extra Advice
- For an enhanced crunch, consider briefly toasting the seeds before mixing them with the chickpea flour.
- To give your crackers a unique flavor kick, experiment with herbs and spices like rosemary, smoked paprika, or chili powder.
- If you’re short on time, you can mix your dough a day in advance, just be sure to keep it covered in the fridge.
Your Questions Answered
What is the prep time for these crackers?
The total prep time is about 10 minutes, plus 20-25 minutes of baking time.
Can I substitute chickpea flour with anything else?
Yes, if you’re not concerned about gluten, you can experiment with whole wheat flour or almond flour for a different flavor and texture.
How do I keep my crackers from breaking too easily?
Ensure that the layer of dough is evenly spread out and not too thin before baking. Let them cool completely, which will help firm them up.
Making homemade chickpea seed crackers is not only simple but also an enjoyable endeavor. With just a few ingredients and a little time, you’ll have a crunchy, healthy snack that satisfies cravings and impresses your friends and family. Enjoy the delicious journey!
Homemade Chickpea Seed Crackers
Ingredients
Method
- Preheat your oven to 350°F (175°C).
- In a large mixing bowl, combine the chickpea flour, sunflower seeds, sesame seeds, pumpkin seeds, salt, and garlic powder.
- Gradually add the water and olive oil while mixing until a dough forms.
- Spread the mixture evenly onto a baking sheet lined with parchment paper, pressing down to create a thin layer.
- Bake for 20-25 minutes or until the crackers turn golden brown and crispy.
- Allow them to cool before breaking into pieces.