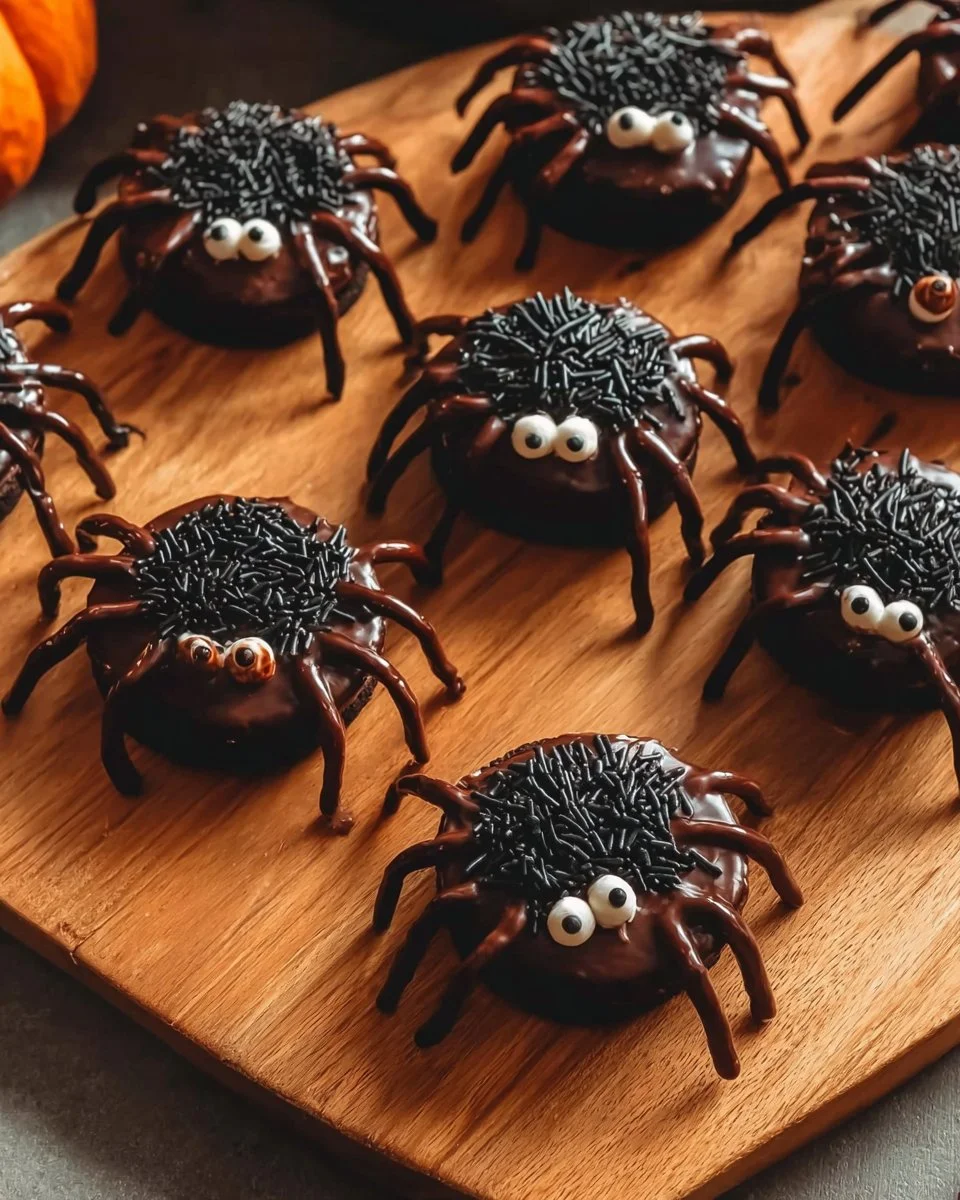
Oreo Spider Halloween Cookies


Oreo Spider Halloween Cookies are a delightful treat that will add a spooky twist to your Halloween festivities. With their chewy texture, delightful crunch from the pretzel legs, and their whimsical appearance, these cookies not only taste delicious but also bring a fun, creative element to any gathering. The combination of creamy Oreo goodness and chocolatey drizzles makes them irresistible for kids and adults alike. Whether you’re hosting a Halloween party, looking for a fun activity to do with your family, or simply want a treat that captures the spirit of the season, these cookies are perfect!
Why You’ll Love This Dish
What makes these Oreo Spider Halloween Cookies a must-try? For starters, they’re quick to whip up, making them an ideal last-minute treat that won’t break the bank. This recipe is a fun, interactive experience for kids, allowing them to get hands-on in the kitchen as they assemble their very own spooky snacks. Plus, with minimal ingredients and short preparation time, you can have a batch ready in no time.
"The kids and I had a blast making these Oreo Spider Cookies! They not only look fantastic but were a hit at our Halloween party!" – Jamie, a satisfied home baker.
The Cooking Process Explained
Getting started on your Oreo Spider Halloween Cookies is fuss-free and straightforward. This recipe involves melting chocolate, assembling your ingredients, and making a delightful mess of chocolate and sprinkles. It’s a wonderful opportunity to use some creativity when decorating the cookies, making them even more appealing. Let’s dive into the step-by-step process to bring this spooky treat to life!
What You’ll Need
Gathering these items will set you up for success:
- 1/2 cup chocolate chips (dairy-free)
- 1 teaspoon coconut oil
- 12 Oreo cookies (Halloween-themed or double stuffed)
- 36 pretzel sticks
- 12 dozen small candy eyeballs
- 3 tablespoons sprinkles
Feel free to swap regular chocolate chips for dark chocolate or use gluten-free Oreos if dietary restrictions are a concern.
Directions to Follow


Follow these simple steps to create your creepy cookies:
In a small bowl, combine 1/2 cup of chocolate chips and 1 teaspoon of coconut oil. Microwave for about a minute, stirring until fully melted and smooth.
Break 3 pretzel sticks in half, so they’re ready to act as spider legs.
Carefully twist each Oreo to separate the wafers. Press the pretzel stick halves into the cream side of the Oreo.
Drizzle about 1/2 teaspoon of the melted chocolate onto the cream side and gently press the ‘blank’ Oreo wafer back on top to secure the legs.
Dip one side of each cookie into the melted chocolate, then top with candy eyeballs and finish with a sprinkle of colorful sprinkles for a festive look.
Place the cookies in the fridge for about 10 minutes to allow the chocolate to harden. Then, enjoy your spooky creations!
Creative Ways to Enjoy
These cookies are not just a visual feast; they treat the taste buds too! For an exciting serving suggestion, arrange the cookies on a colorful platter and accompany them with pumpkin spice hot chocolate or whipped cream for dipping. Alternatively, you could create a themed dessert table alongside other Halloween-inspired treats, like ghost cupcakes or fruit skeletons—making your gathering all the more festive!
Keeping Leftovers Fresh
To ensure your Oreo Spider Cookies remain delicious, store them in an airtight container at room temperature. You can keep them for up to five days. If you want to prolong their shelf life, consider placing them in the fridge, where they can last for about a week. Remember, if they are not consumed quickly, it’s best to avoid stacking them to preserve their decoration and integrity.
Helpful Cooking Tips
For those looking to elevate their cookie-making experience, consider these practical tips:
Chocolate Consistency: If your chocolate becomes too thick after microwaving, add a drop of coconut oil to reach your desired consistency.
Eyeball Placement: To prevent the candy eyeballs from sliding off, apply a small dab of melted chocolate to the base of each eyeball before sticking it to the cookie.
Sprinkle Variations: Feel free to get creative with the sprinkles—try a mixture of orange, black, and purple for an extra festive touch.
Recipe Variations
There are numerous ways to shake things up with this recipe:
- Nut Butter Variation: Swap the coconut oil with almond or peanut butter for a nutty twist.
- Flavored Oreos: Experiment with different Oreo flavors, like mint or peanut butter, to personalize your spider cookies.
- Gluten-Free Options: Use gluten-free pretzels and Oreos for a friendly treat that everyone can enjoy.
Your Questions Answered
What is the prep time for Oreo Spider Halloween Cookies?
The prep time for this recipe is approximately 15-20 minutes. Allow some additional time for the cookies to harden in the fridge.
Can I use regular chocolate instead of dairy-free?
Absolutely! You can substitute regular chocolate chips if dairy is not a concern for your dietary needs.
How can I make these cookies vegan?
To make these cookies vegan, ensure you use dairy-free chocolate and Oreos (most varieties are vegan-friendly). The coconut oil is already a plant-based option.
Now you have everything you need to have a spooky good time making Oreo Spider Halloween Cookies. Enjoy the process, and don’t forget to share your delicious results!


Oreo Spider Halloween Cookies
Ingredients
Method
- In a small bowl, combine chocolate chips and coconut oil. Microwave for about a minute, stirring until fully melted and smooth.
- Break 3 pretzel sticks in half for spider legs.
- Carefully twist each Oreo to separate the wafers. Press the pretzel stick halves into the cream side of the Oreo.
- Drizzle about 1/2 teaspoon of the melted chocolate onto the cream side and gently press the ‘blank’ Oreo wafer back on top to secure the legs.
- Dip one side of each cookie into the melted chocolate, then top with candy eyeballs and finish with a sprinkle of colorful sprinkles for a festive look.
- Place the cookies in the fridge for about 10 minutes to allow the chocolate to harden.


