Cheesy Garlic Butter Mushroom Stuffed Chicken

Why Make This Recipe
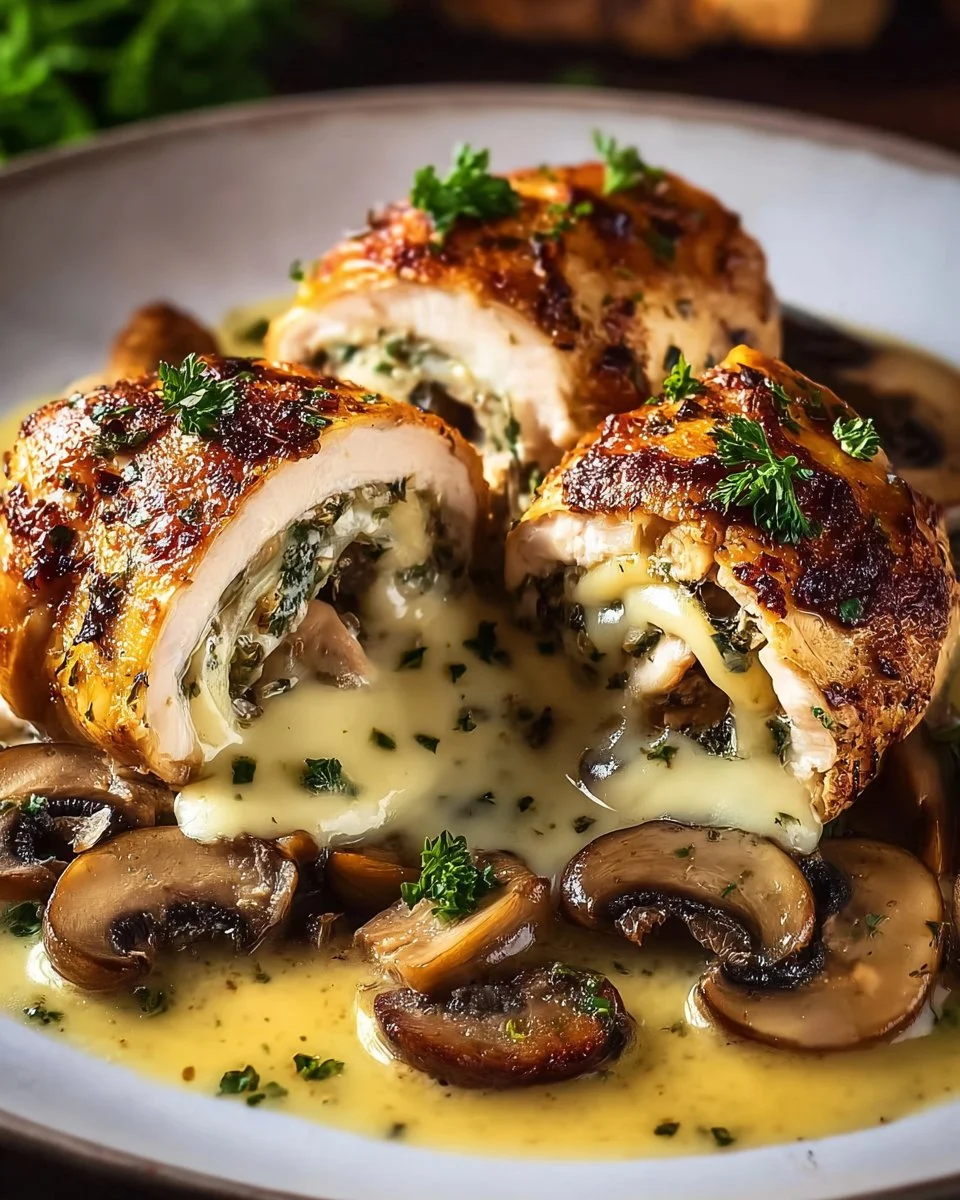
Cheesy Garlic Butter Mushroom Stuffed Chicken is a delightful dish that combines tender chicken with a rich and flavorful filling. This recipe is perfect for a cozy dinner at home or to impress guests at a gathering. The gooey cheese, savory mushrooms, and aromatic garlic come together to create a delicious meal that everyone will enjoy. Plus, it’s not too complicated to make, making it a great choice for cooks of any skill level.
How to Make Cheesy Garlic Butter Mushroom Stuffed Chicken
Ingredients
- 2 large chicken breasts, butterflied and pounded thin
- Salt & pepper, to taste
- 1 tsp dried Italian herbs
- 1 cup mushrooms, finely chopped
- 2 garlic cloves, minced
- 1 tbsp butter
- 1/2 cup shredded mozzarella or provolone
- 2 tbsp grated Parmesan
- 1 tbsp chopped parsley (plus extra for garnish)
- 2 tbsp butter (for the sauce)
- 1 garlic clove, minced (for the sauce)
- 1/4 cup chicken broth
- 1/4 cup heavy cream
- 1 tsp cornstarch (optional, for thickness)
- Extra mushrooms, sliced (optional for serving)
Directions
Make the Filling: In a skillet, sauté the chopped mushrooms in butter over medium heat. Add minced garlic, dried herbs, salt, and pepper. Cook until the mushrooms are golden and soft. Stir in the shredded cheese, grated Parmesan, and chopped parsley. Set aside.
Stuff & Roll the Chicken: Season the pounded chicken breasts with salt, pepper, and dried herbs. Spoon the mushroom filling onto each chicken breast and roll tightly. Secure the rolls with toothpicks or kitchen twine.
Sear the Rolls: In an oven-safe skillet, heat some oil and sear the chicken rolls on all sides until golden brown. Remove the rolls from the skillet and set them aside.
Make the Sauce: In the same skillet, melt butter and sauté minced garlic for about 30 seconds. Add chicken broth and heavy cream. Let it simmer for 2–3 minutes. If you want a thicker sauce, whisk in cornstarch that has been dissolved in a bit of water. Return the chicken rolls and any extra sliced mushrooms to the skillet.
Bake & Serve: Bake the chicken in the oven at 190°C (375°F) for 15–18 minutes until the chicken is cooked through. Garnish with extra parsley and serve with mashed potatoes, rice, or crusty bread.
How to Serve Cheesy Garlic Butter Mushroom Stuffed Chicken
Serve this delicious stuffed chicken hot from the oven, garnished with fresh parsley. It pairs perfectly with a side of creamy mashed potatoes, fluffy rice, or crusty bread to soak up the rich sauce. You can also add a fresh green salad on the side for a balanced meal.
How to Store Cheesy Garlic Butter Mushroom Stuffed Chicken


If you have leftovers, allow the chicken to cool completely before storing. Place it in an airtight container and keep it in the refrigerator. It will stay fresh for up to 3 days. To reheat, place the chicken in a preheated oven at 175°C (350°F) until warmed through, or microwave it briefly.
Tips to Make Cheesy Garlic Butter Mushroom Stuffed Chicken
- Make sure to pound the chicken breasts evenly for even cooking.
- Use a mix of mushrooms for added flavor, such as cremini or shiitake.
- For extra flavor, consider marinating the chicken briefly in olive oil, lemon juice, and herbs before stuffing.
- Experiment with different cheeses, like cheddar or gouda, for a unique taste.
Variation
You can switch up the filling by adding spinach, sun-dried tomatoes, or different herbs. Experiment with different cheeses or use a spicy cheese for a kick.
FAQs
Can I use frozen chicken breasts?
Yes, you can use frozen chicken breasts. Just make sure to thaw them completely before you start cooking.
What other sauces can I use?
You can try a creamy Alfredo sauce or a light tomato sauce instead of the garlic butter sauce if you prefer.
Can I make this dish ahead of time?
Yes, you can prepare the chicken rolls ahead of time and store them in the fridge. Just bake them when you’re ready to serve!

Cheesy Garlic Butter Mushroom Stuffed Chicken
Ingredients
Method
- In a skillet, sauté the chopped mushrooms in butter over medium heat.
- Add minced garlic, dried herbs, salt, and pepper. Cook until the mushrooms are golden and soft.
- Stir in the shredded cheese, grated Parmesan, and chopped parsley. Set aside.
- Season the pounded chicken breasts with salt, pepper, and dried herbs.
- Spoon the mushroom filling onto each chicken breast and roll tightly.
- Secure the rolls with toothpicks or kitchen twine.
- In an oven-safe skillet, heat some oil and sear the chicken rolls on all sides until golden brown.
- Remove the rolls from the skillet and set them aside.
- In the same skillet, melt butter and sauté minced garlic for about 30 seconds.
- Add chicken broth and heavy cream. Let it simmer for 2–3 minutes.
- If you want a thicker sauce, whisk in cornstarch that has been dissolved in a bit of water.
- Return the chicken rolls and any extra sliced mushrooms to the skillet.
- Bake the chicken in the oven at 190°C (375°F) for 15–18 minutes until the chicken is cooked through.
- Garnish with extra parsley and serve with mashed potatoes, rice, or crusty bread.

