Vegan Garlic Noodles


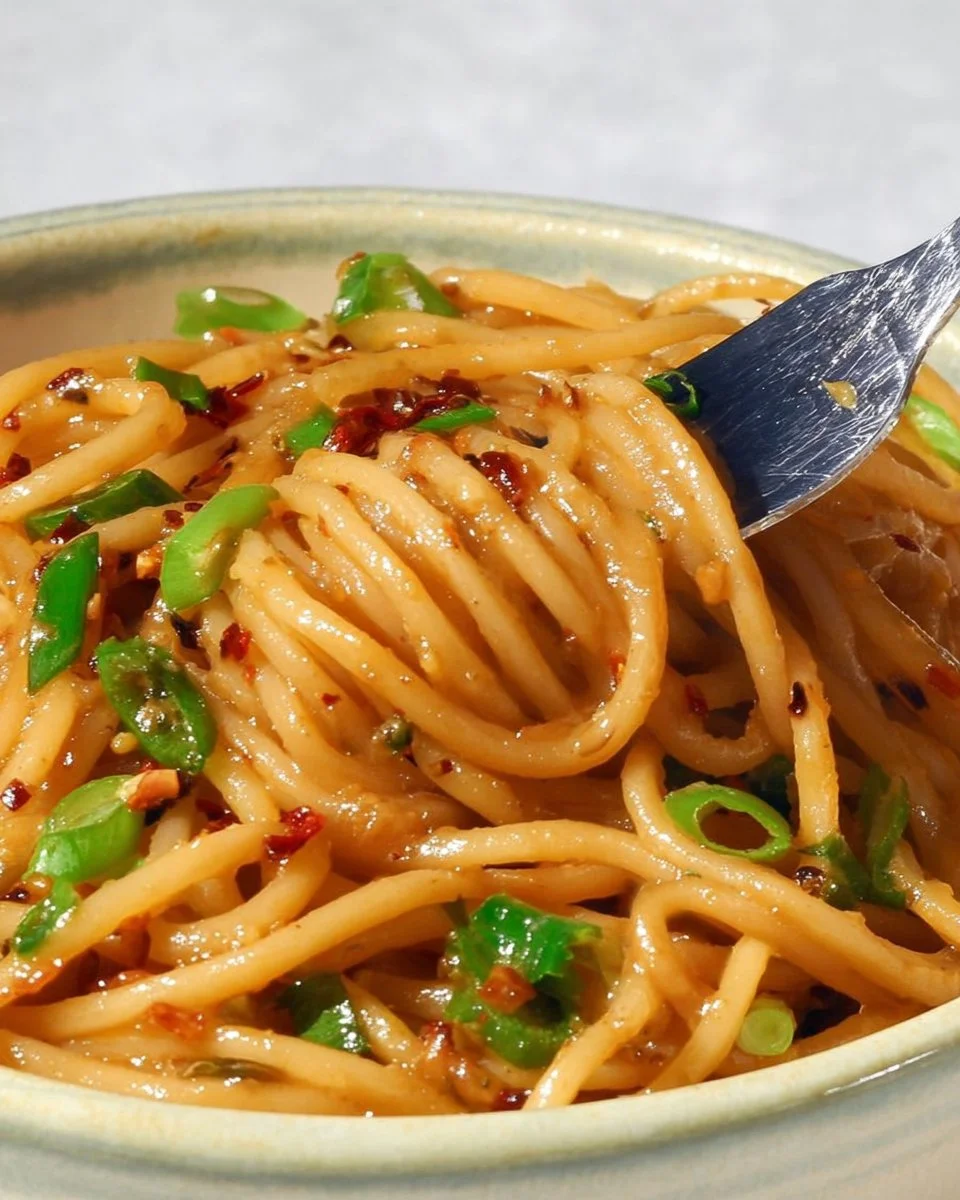
Vegan Garlic Noodles are the kind of dish that embodies comfort and satisfaction. With their rich flavors and creamy texture, these noodles become an instant favorite for anyone seeking a delightful plant-based meal. I first discovered this recipe on a hectic weeknight when I was in desperate need of a quick yet delicious dinner. The best part? It takes minimal ingredients and just a handful of steps to whip them up, making it a perfect go-to for busy days.
Why You’ll Love This Dish
Imagine a dish that’s not only quick and easy but also packed with flavor—this Vegan Garlic Noodles recipe checks all the boxes. It’s perfect for those who want a satisfying meal without spending hours in the kitchen. With just a few pantry staples, you can create a delectable dinner that’s sure to impress even the pickiest eaters.
“These garlic noodles have become a staple in my house! So quick to make and bursting with flavor—my family loves them!”
No more ordering takeout when you can prepare this meal in under 20 minutes! This dish is ideal for weeknight dinners, cozy brunches, or whenever you’re craving something rich and savory.
The Cooking Process Explained
Making Vegan Garlic Noodles is straightforward and enjoyable. Here’s how the magic happens:
- Start by cooking your pasta in a large pot—this will be the base of your dish.
- While the pasta cooks, chop your garlic and green onions, making sure to separate the white parts from the green.
- Next, sauté the garlic and white onion in a skillet until fragrant, then add coconut milk and tamari or soy sauce for that rich flavor.
- Finally, toss in your cooked pasta and the green onion tops for a fresh touch.
Ready to dive in? Let’s gather our ingredients.
What You’ll Need
To create your delightful Vegan Garlic Noodles, you’ll need the following ingredients:
- 8 oz pasta of choice (GF options available; see note 1)
- 1 small head garlic, minced or sliced thinly, adjust to taste
- 1/2 bunch green onions, sliced (white and green parts separated)
- 1/2 cup canned coconut milk (creamy and rich; see note 2)
- 3 tbsp reduced sodium tamari or soy sauce (or use no-soy alternative)
- 1 tsp hoisin sauce (optional, but recommended for added flavor)
These ingredients come together to create a comforting noodle dish that will keep you coming back for more!
Step-by-Step Instructions


Now that you have your ingredients ready, let’s get cooking:
Cook the Pasta: Bring a large pot of salted water to a boil. Add in your pasta and cook according to package directions until al dente. Drain the pasta, then return it to the pot, setting it aside.
Prepare the Aromatics: While the pasta is cooking, peel and mince your garlic. Slice the green onions, keeping the white and green parts separate.
Sauté: Heat a large skillet over medium-high heat. Once hot, add the minced garlic with a tablespoon of water. Stir frequently to prevent sticking, adding more water as needed. Cook until fragrant (about 1-2 minutes).
Add Onions: Toss in the white parts of the green onions. Sauté for another 3 minutes, adding more water if they start to stick.
Make the Sauce: Pour in the coconut milk and tamari or soy sauce, stirring well. Heat this through for about a minute.
Combine: Add the green parts of the onion and then the cooked pasta into the skillet. Toss everything together using tongs or forks, making sure the noodles are well coated in the sauce.
Serve: Plate your Vegan Garlic Noodles hot, garnished with vegan Parmesan, chili flakes, or extra green onion if you like.
Storage: Enjoy while fresh; leftovers can be kept in an airtight container in the fridge for up to five days. Add a splash of coconut milk or water when reheating to keep everything creamy.
Creative Ideas for Plating
To take your Vegan Garlic Noodles to the next level, try these serving suggestions:
- Garnish with Fresh Herbs: Sprinkle with fresh cilantro or basil for a fresh, aromatic touch.
- Add Vegetables: Toss in sautéed veggies like bell peppers, snap peas, or bok choy for a nutritious boost.
- Serve with a Salad: A side salad with a light vinaigrette pairs beautifully, balancing the richness of the noodles.
Keeping Leftovers Fresh
To ensure your Vegan Garlic Noodles stay fresh and tasty:
- Store the leftovers in an airtight container in the refrigerator for up to five days.
- For best results, reheat gently on the stove over low heat, adding a little coconut milk or water to maintain a creamy texture.
- Avoid freezing if possible, as the texture may change when thawed.
Pro Chef Tips
Here are a few expert tips to elevate your Vegan Garlic Noodles:
- Adjust for Garlic Lovers: If you love garlic, don’t hesitate to add more to your sauce for an intense flavor.
- Flavor Enhance: A squeeze of fresh lime or lemon juice right before serving can brighten the dish and enhance all the flavors.
- Experiment with Noodles: Try different types of noodles (like rice noodles or whole grain) to find your favorite combination.
Creative Twists
There are endless possibilities to customize your Vegan Garlic Noodles:
- Spicy Garlic Noodles: Add crushed red pepper or chili oil for an extra kick.
- Protein Boost: Include tofu, chickpeas, or tempeh for added protein.
- Nutty Flavors: Toss in some chopped peanuts or sesame seeds for crunch and flavor.
FAQs
How long does it take to prepare these noodles?
Preparation and cooking take under 20 minutes, making it a quick meal option for busy days!
Can I use other types of pasta?
Absolutely! Any pasta shape works well, including gluten-free varieties if needed.
Is it safe to eat the leftovers?
Yes, as long as they are stored in the fridge in an airtight container and consumed within five days. Always reheat thoroughly before eating!
Enjoy the rich, satisfying flavors of Vegan Garlic Noodles as you dive into creating this delicious meal. You’ll wonder how you ever lived without it!


Vegan Garlic Noodles
Ingredients
Method
- Bring a large pot of salted water to a boil. Add the pasta and cook according to package directions until al dente. Drain the pasta, then return it to the pot and set aside.
- While the pasta is cooking, peel and mince the garlic. Slice the green onions, keeping the white and green parts separate.
- Heat a large skillet over medium-high heat. Once hot, add the minced garlic with a tablespoon of water. Stir frequently, adding more water as needed, and cook until fragrant (about 1-2 minutes).
- Toss in the white parts of the green onions and sauté for another 3 minutes, adding more water if they start to stick.
- Pour in the coconut milk and tamari or soy sauce, stirring well. Heat through for about a minute.
- Add the green parts of the onion and then the cooked pasta into the skillet. Toss everything together using tongs or forks, ensuring the noodles are well coated in the sauce.
- Plate the Vegan Garlic Noodles hot, garnished with vegan Parmesan, chili flakes, or extra green onion if desired.


