 By Natalie
In this recipe
Saltines From Scratch: The Ultimate Homemade Crunch
There’s something undeniably charming about homemade crackers, especially when you can whip them up with just a handful of simple ingredients. This recipe for Saltines from scratch transports me back to cozy evenings, where the aroma of freshly baked crackers fills my kitchen, making the air feel warm and inviting. Perfect for snacking on their own or pairing with soups and dips, these crunchy delights are not only easy to make but also allow you to control the flavors and toppings. Let’s dive into the delightful world of homemade Saltines!
Why You’ll Love This Dish
Making Saltines from scratch is a game-changer. Not only are they easy to whip up, but you also know exactly what goes into them. With basic pantry staples, this recipe is budget-friendly yet yields impressively delicious results. Want to impress your friends at your next gathering? Picture this: a platter of your homemade Saltines served with creamy dips or flavorful cheeses. Whether it’s a weeknight nibble, a special holiday treat, or even the perfect addition to a family brunch, these crackers have your back.
“I never knew making Saltines could be so simple! They were a hit with the kids and perfect for our movie night! — Sarah K.”
Preparing Saltines From Scratch
To get started, you’ll need to follow a straightforward process that transforms humble ingredients into crispy, flavorful crackers. In total, the entire process takes a little planning, especially since the dough requires resting in the fridge for optimal flavor. Here’s a quick overview of what you’ll do:
- Combine dry ingredients and whisk together.
- Melt the butter and mix it with water and oil, then combine with the dry ingredients.
- Knead the dough until smooth, then rest it in the fridge.
- Roll out and cut the dough into squares, then bake.
- Enjoy your homemade Saltines!
Gather These Ingredients
To make these delightful Saltines, you’ll need the following ingredients:
- 1 1/2 cups cake flour
- 6 tablespoons water
- 2 tablespoons softened butter
- 2 tablespoons vegetable oil
- 2 teaspoons instant yeast
- 1 teaspoon sugar
- 1/4 teaspoon baking soda
- 1/4 teaspoon cream of tartar
- 1/2 to 1 teaspoon sea salt or herb salts for topping
These basic elements can often be found in your pantry, making this recipe not just fun but very accessible!
Step-by-Step Instructions
In a medium-sized bowl, combine the cake flour, instant yeast, baking soda, cream of tartar, and sugar. Whisk until well mixed.
In a small saucepan, gently heat the butter, oil, and water together until the butter is melted. Allow this mixture to cool to around 120°F (just hot enough that it won’t burn your touch).
Create a well in your dry ingredients and pour in the melted butter mixture. Using an electric mixer, beat the mixture on medium and then high speed until the butter is fully incorporated and a dough forms.
Knead the dough by hand until it forms a soft ball. If it feels sticky, add a little more flour; if it’s too dry, sprinkle in a touch more water.
Lightly grease the bowl, cover it with plastic wrap, and let the dough rest in the fridge for at least 12 hours and up to 18 hours. This step is crucial for developing flavor.
Remove the dough from the fridge and allow it to warm up at room temperature for about 15 minutes.
Preheat your oven to 400°F and prepare large baking sheets with parchment paper or grease them.
Knead the dough for a few minutes until smooth and clay-like, then divide it into four pieces. Roll each piece out as thin as possible, preferably using a pasta roller for ultra-thin dough.
Cut the rolled dough into 2×2 squares with a pizza cutter, placing them on the prepared baking sheets close to each other.
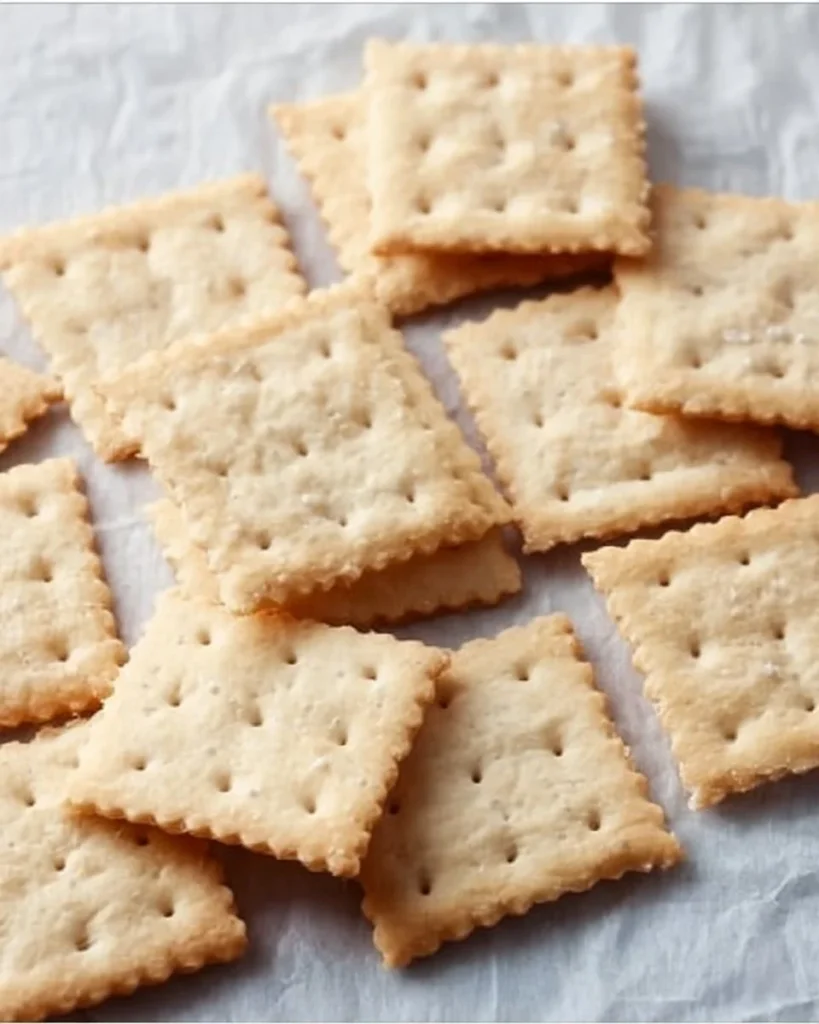
Use a fork to poke holes into each square for that classic Saltine look. Brush them lightly with water and sprinkle generously with sea or herb salt.
Bake for 8 to 10 minutes, checking closely at the 8-minute mark to avoid browning too much unless you prefer extra crispy ones!
Once baked, allow them to cool on the tray. Store in an airtight container for up to a week—if they last that long!
Best Ways to Enjoy It
Now that you’ve baked your Saltines, how do you plan to savor them? Here are some enticing serving suggestions:
- Serve alongside soups or stews to add a crunchy texture.
- Pair with your favorite hummus, cheese spreads, or even a homemade spinach dip for a delightful appetizer.
- Crumble them over salads for an added crunch.
- Enjoy them straight out of the container as a satisfying snack!
- Airtight Container: Place the cooled crackers in an airtight container to maintain their crunch for up to a week.
- Avoid Moisture: Make sure to keep them in a cool, dry place to prevent them from becoming soggy.
Creative Twists on the Classic
Looking to spice things up? Here are some variations you can try:
- Cheesy Saltines: Fold in grated cheese like parmesan or cheddar into the dough for a savory twist.
- Herb-Infused: Mix in dried herbs like rosemary or thyme for herb-flavored crackers.
- Sweet Version: Add a bit of cinnamon and sugar for a sweet twist, perfect for teas or coffees.
Your Questions Answered
How long does it take to prepare these Saltines?
The overall process takes about 12 to 18 hours because of the resting time for the dough. However, hands-on time is minimal!
Can I use all-purpose flour instead of cake flour?
While cake flour yields a lighter texture, you can substitute all-purpose flour. Just note that the crackers may be a bit denser.
Try these saltines from scratch today, and experience the joy of crunchy homemade goodness that’s sure to be a hit with everyone!

Homemade Saltines
Ingredients
Method
- In a medium-sized bowl, combine the cake flour, instant yeast, baking soda, cream of tartar, and sugar. Whisk until well mixed.
- In a small saucepan, gently heat the butter, oil, and water together until the butter is melted. Allow this mixture to cool to around 120°F (just hot enough that it won't burn your touch).
- Create a well in your dry ingredients and pour in the melted butter mixture. Using an electric mixer, beat the mixture on medium and then high speed until the butter is fully incorporated and a dough forms.
- Knead the dough by hand until it forms a soft ball. If it feels sticky, add a little more flour; if it’s too dry, sprinkle in a touch more water.
- Lightly grease the bowl, cover it with plastic wrap, and let the dough rest in the fridge for at least 12 hours (up to 18 hours).
- Remove the dough from the fridge and allow it to warm up at room temperature for about 15 minutes.
- Preheat your oven to 400°F and prepare large baking sheets with parchment paper or grease them.
- Knead the dough for a few minutes until smooth and divide it into four pieces. Roll each piece out as thin as possible.
- Cut the rolled dough into 2x2 squares with a pizza cutter, placing them on the prepared baking sheets.
- Use a fork to poke holes into each square and brush them lightly with water. Sprinkle generously with salt.
- Bake for 8 to 10 minutes, checking closely at the 8-minute mark to avoid browning too much.
- Once baked, allow them to cool on the tray.
- Store in an airtight container for up to a week.