No Bake Homemade Crunch Bars


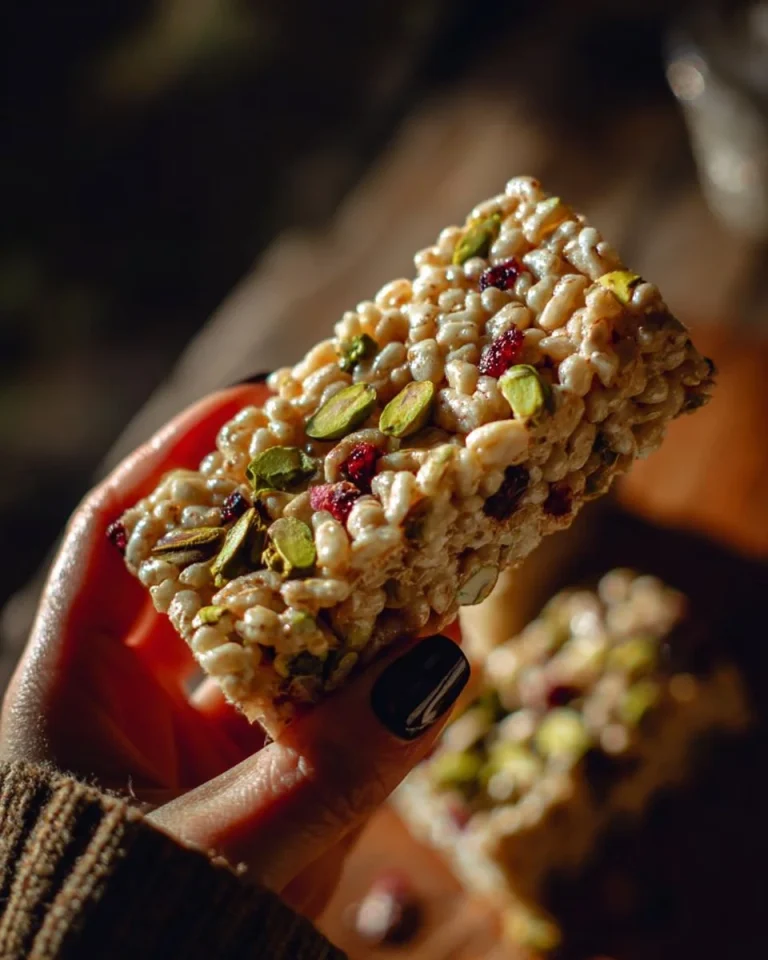
If you’re craving a sweet and crunchy treat without the hassle of baking, No-Bake Homemade Crunch Bars are the perfect solution. This easy-to-make recipe delivers a delightful combination of chocolatey goodness and crisp rice cereal crunch. Let’s dive into the world of no-bake desserts and discover how to create these irresistible Crunch Bars!
The Story of No-Bake Homemade Crunch Bars:
No-Bake Homemade Crunch Bars are a testament to the joy of simplicity in dessert-making. Born from the desire for a quick and satisfying treat, these bars require minimal effort and time. The marriage of smooth chocolate and crispy rice cereal creates a delightful texture that appeals to both kids and adults alike, making them a staple in the world of no-bake delights.
Why You Should Make No-Bake Homemade Crunch Bars:
- Quick and Easy: Enjoy a homemade sweet treat without the need for baking, making these bars a time-saving and fuss-free option.
- Crunchy Satisfaction: The combination of chocolate and crisp rice cereal provides a satisfying crunch in every bite, pleasing your taste buds with each mouthful.
- Versatility: Customize your Crunch Bars by adding your favorite mix-ins, such as nuts, dried fruit, or even a swirl of peanut butter for an extra layer of flavor.
How to Serve No-Bake Homemade Crunch Bars:
Serving No-Bake Homemade Crunch Bars is a simple and enjoyable process:
- Cut: Once the bars have set, cut them into individual servings using a sharp knife.
- Plate: Arrange the bars on a serving platter or individual plates, showcasing their chocolatey and crunchy appeal.
- Enjoy: Dive in and savor the delightful combination of smooth chocolate and crispy texture.
What Goes Well With No-Bake Homemade Crunch Bars:


Enhance the Crunch Bars experience with these complementary options:
- Whipped Cream: Serve with a dollop of freshly whipped cream for a light and airy contrast.
- Hot Cocoa or Coffee: Enjoy with a warm cup of hot cocoa or coffee for a cozy pairing.
- Ice Cream (Optional): Create a sundae by pairing Crunch Bars with your favorite ice cream flavors.
How to Store No-Bake Homemade Crunch Bars:
If there are any leftovers, follow these storage steps:
- Cool and Set: Allow the Crunch Bars to cool and set completely in the refrigerator.
- Store: Keep the bars in an airtight container in the refrigerator to maintain their freshness and texture.
- Serve Chilled (Optional): Enjoy the bars straight from the refrigerator for a cool and refreshing treat.
Tips for No-Bake Homemade Crunch Bars:
- Quality Chocolate: Use high-quality chocolate for a rich and satisfying flavor in your Crunch Bars.
- Mix-In Ideas: Experiment with different mix-ins such as chopped nuts, dried fruit, or shredded coconut to add variety and texture.
- Evenly Spread: Ensure that the chocolate mixture is evenly spread over the rice cereal to create a uniform and delightful crunch.
Now armed with these insights and tips, you’re ready to embark on a journey of no-bake sweetness with No-Bake Homemade Crunch Bars. Whether it’s a quick snack or a crowd-pleasing dessert, these bars are sure to become a favorite in your repertoire of easy and delicious treats.
For Ingredients And Complete Cooking Instructions Please Head On Over To Next Page Or Open button (>) and don’t forget to SHARE with your Facebook friends
RECIPE :
No Bake Homemade Crunch Bars
INGREDIENTS:
- 3 cups crispy rice cereal
- 1 1/2 cups chocolate chips
- 1 cup peanut butter can substitute any nut or seed butter
- 1/2 cup maple syrup
- 1/4 cup coconut oil can sub for grass fed butter
INSTRUCTIONS:
- Line an 8 x 8-inch baking dish or a deep baking tray of your choice with parchment paper and set it aside.
- In a large mixing bowl, add crispy rice cereal and set it aside.
- In a microwave-safe bowl or on the stovetop, combine all your other ingredients and heat until melted.
- Remove the mixture from the microwave or stove and whisk until it is completely incorporated.
- Pour the melted chocolate/peanut butter mixture over the crispy rice cereal and mix until well combined.
- Pour the mixture into the lined baking dish and refrigerate until firm, at least for an hour.
- Remove from the refrigerator and cut into bars. Enjoy!


