 By Natalie
In this recipe
Halloween Mini Pizzas: The Perfect Spooktacular Treat
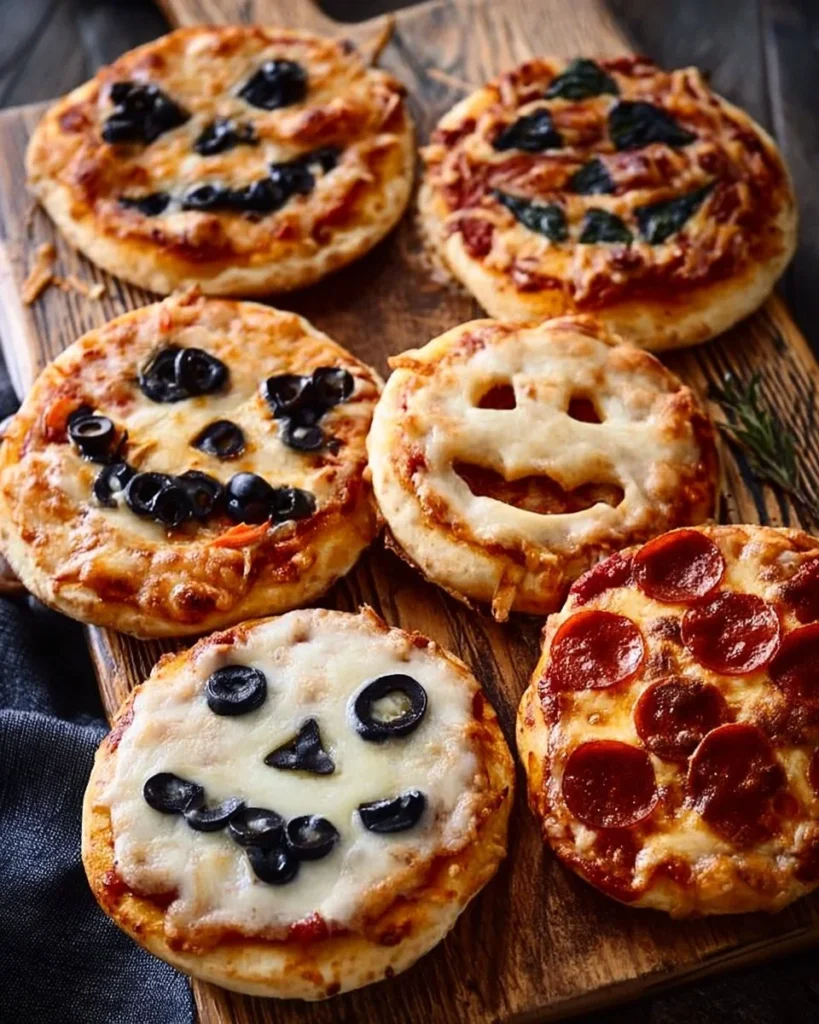
When Halloween rolls around, it’s time to get creative in the kitchen! Halloween Mini Pizzas are not just a festive treat; they’re a delicious and fun way to celebrate the fall season. I can still recall the first Halloween gathering I hosted where I whipped up these delightful mini pizzas. They were an instant hit! These personal-sized pizzas are incredibly easy to make, allowing both kids and adults to unleash their creativity with toppings. Whether you’re prepping for a spooky movie night or a haunted house party, these little snacks will bring smiles and savory joy to your table.
Reasons to Try It
This recipe is both fun and functional, making it a perfect choice for your Halloween celebrations! For starters, it’s budget-friendly; you can easily whip up multiple servings without breaking the bank. Additionally, as each pizza is customizable, every guest can create their perfect Halloween treat—making it a hit at parties, family dinners, or even a fun weeknight dinner option. Plus, they’re quick to prepare; you can go from hungry to satisfied in about 30 minutes!
“I made these mini pizzas for my son’s Halloween party, and they stole the show! Everyone loved decorating their own, and they disappeared in no time!” — A happy parent.
The Cooking Process Explained
Creating Halloween Mini Pizzas is a straightforward process filled with easy-to-follow steps. You’ll get your oven preheating, prep your toppings, and watch as these mini crusts transform into spooky yet delicious treats. Here’s an overview of how the magic happens!
- Preheat your oven to 425°F (220°C) and prepare your baking sheet.
- Assemble your ingredients for a quick grab-and-go while you decorate.
- Bake your creations and admire the festive results!
Now it’s time to dive into the specifics!
Key Ingredients
Gather these tasty items for your spooktacular mini pizzas:
- 8–10 Mini Pizza Crusts (personal-size bases)
- 3/4 cup Pizza Sauce
- 1 cup Mozzarella Cheese (shredded)
- 1/4 cup Black Olives (sliced)
- 1/4 cup Mini Pepperoni (optional)
- Orange & Green Bell Peppers (thin strips for jack-o’-lantern designs)
- 4 sticks Part-Skim String Cheese (pulled apart)
- 2 tbsp Fresh Basil (chiffonade)
- Olive Oil Spray (for misting the baking sheet)
Feel free to experiment with the toppings! For a healthier twist, consider using whole wheat mini crusts or switching out mozzarella for a dairy-free cheese.
Step-by-Step Instructions
Let’s make some Halloween magic in the kitchen!
- Preheat your oven to 425°F (220°C).
- Lightly mist a baking sheet with olive oil spray to prevent sticking.
- Spread 1–2 tablespoons of pizza sauce on each mini crust, leaving a small border.
- Scatter the shredded mozzarella cheese over half the pizzas.
- Use string cheese strips to create mummy faces on those pizzas.
- Decorate with sliced black olives as spider bodies and eyes, and bell pepper strips to make jack-o’-lantern smiles. Add mini pepperoni on top if desired.
- Bake your mini pizzas for 10–12 minutes until the crusts are golden and the cheese is melted. For even browning, rotate the pan halfway through baking.
- Allow to cool for 2 minutes, then garnish with fresh basil before serving.
Best Ways to Enjoy It
For a festive presentation, arrange your Halloween Mini Pizzas on a spider-web-themed platter. Pair them with a simple side salad or some crunchy veggie sticks for a balanced treat. A spooky punch or festive mocktail can complete the meal, ensuring your gathering is not only delicious but also visually enticing! Treating your guests to a mini pizza decorating station can also add to the fun, encouraging some creative expression.
- Be generous with your toppings, but don’t overload the pizzas; this helps prevent sogginess.
- For a more uniform melt on the cheese, use freshly shredded mozzarella rather than pre-shredded, which often contains anti-caking agents.
- If you’re feeling particularly festive, sprinkle some Italian seasoning into your sauce for a flavor boost!
Creative Twists
Feel free to incorporate creative twists on these mini pizzas! Swap in your favorite sauces—think pesto or BBQ sauce for a unique flavor dimension. Consider adding caramelized onions or sautéed mushrooms as gourmet topping options. You can even cater to dietary preferences by using gluten-free crusts or vegan cheese alternatives.
Your Questions Answered
How long does it take to make Halloween Mini Pizzas?
It typically takes about 30 minutes from prep to table, making it an excellent quick recipe for busy evenings or party prep.Can I make these mini pizzas ahead of time?
Absolutely! You can prepare the mini pizzas a day in advance and store them in the fridge. Just bake them just before serving for the freshest taste.What other toppings can I use?
Get creative! You can use any of your favorite pizza toppings—think fresh vegetables, different cheeses, or even cooked meats.How long can I keep leftovers?
Store leftover mini pizzas in the fridge for up to 3 days, or freeze them for up to a month in airtight packaging.
These Halloween Mini Pizzas are sure to become a cherished tradition in your household. Get ready for a frightfully delightful feast this season!

Halloween Mini Pizzas
Ingredients
Method
- Preheat your oven to 425°F (220°C).
- Lightly mist a baking sheet with olive oil spray to prevent sticking.
- Spread 1–2 tablespoons of pizza sauce on each mini crust, leaving a small border.
- Scatter the shredded mozzarella cheese over half the pizzas.
- Use string cheese strips to create mummy faces on those pizzas.
- Decorate with sliced black olives as spider bodies and eyes, and bell pepper strips for jack-o’-lantern smiles. Add mini pepperoni on top if desired.
- Bake your mini pizzas for 10–12 minutes until the crusts are golden and the cheese is melted.
- For even browning, rotate the pan halfway through baking.
- Allow to cool for 2 minutes, then garnish with fresh basil before serving.