Halloween Peanut Butter Cups
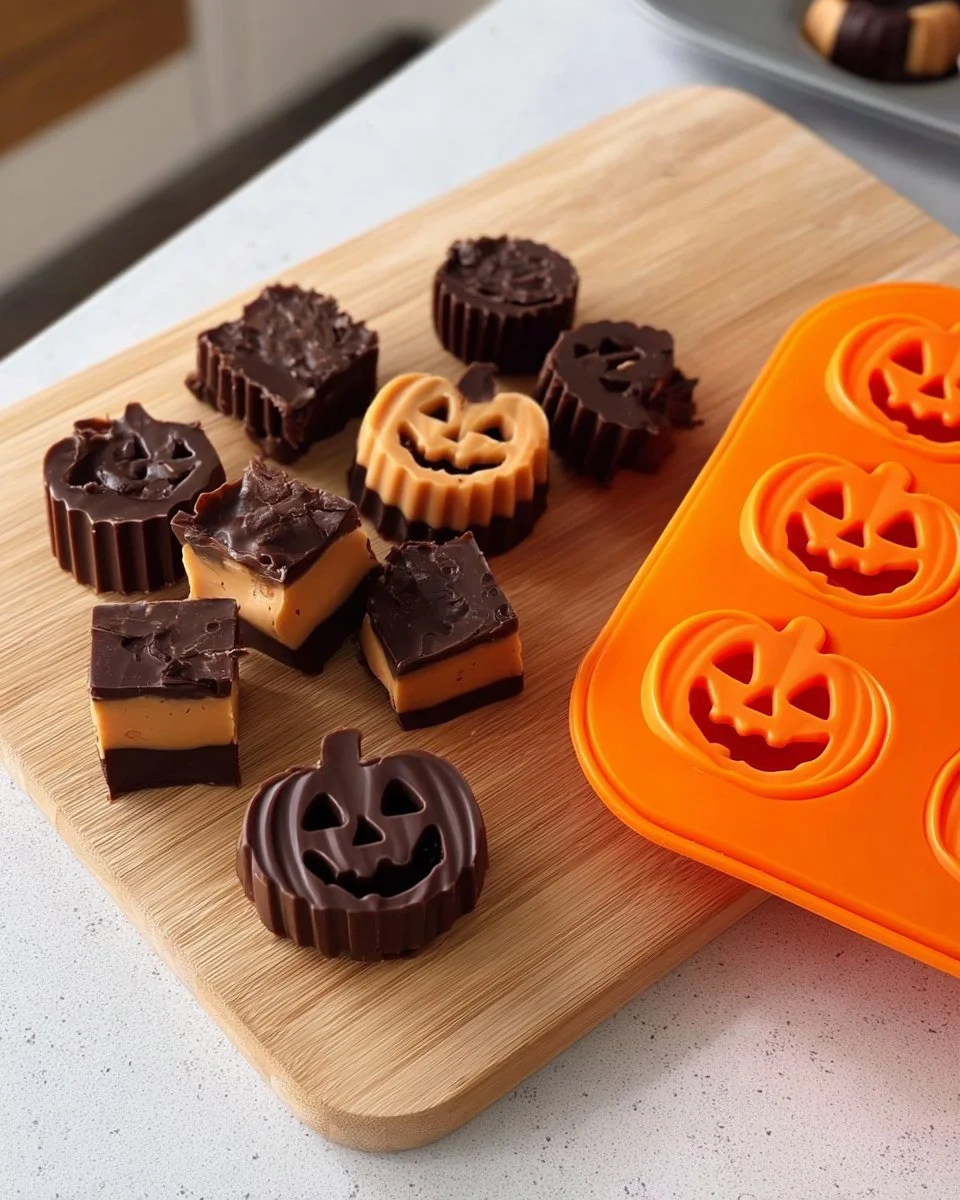

A Festive Delight for Halloween Celebrations
Halloween is just around the corner, and what better way to celebrate than with homemade Halloween Peanut Butter Cups? These delightful treats blend creamy peanut butter and decadent chocolate, creating a sweet yet slightly salty confection that will make your taste buds dance. Growing up, these were my go-to indulgence during October, and whipping them up in your own kitchen is not only fun but also fills your home with the warm scents of baking and chocolate. Plus, they’re perfect for sharing at Halloween parties or tucking into snack bags for trick-or-treating!
Why You’ll Love This Dish
Imagine the joy of biting into a smooth, rich chocolate cup with a sweet, creamy peanut butter center. The best part? Making these is super simple, which means you can whip up a batch even on a busy weeknight. Halloween Peanut Butter Cups are budget-friendly too! With just a few ingredients, you can create an impressive and delightful treat without breaking the bank. These are sure to become kid-approved favorites, making them a great addition to Halloween festivities.
"These Peanut Butter Cups are a total game-changer! They taste just like the store-bought ones, but better, and making them at home is so much fun!" – A satisfied home cook
Preparing Halloween Peanut Butter Cups
Making these delightful treats is a breeze! You’ll start by melting chocolate, which not only coats the peanut butter filling but also adds that glossy finish we all crave. Next, you’ll mix together the creamy peanut butter filling, which is as simple as combining just a few ingredients. Finally, it’s all about layering: the chocolate, the filling, and then a final chocolate layer on top. With about 60 minutes of chill time, you’ll find yourself digging into a delectable Halloween treat in no time.
What You’ll Need


To bring these Halloween Peanut Butter Cups to life, gather the following ingredients:
- Chocolate Chips: For a smooth, rich coating—milk chocolate or dark chocolate works great!
- Creamy Peanut Butter: A must-have for the delicious filling.
- Powdered Sugar: This adds sweetness and helps with texture.
- Butter: To enhance creaminess and flavor.
Feel free to swap creamy peanut butter for crunchy, or even try almond butter for a fun twist!
Step-by-Step Instructions
- Melt the Chocolate: In a microwave-safe bowl, melt about half of your chocolate chips in 30-second increments, stirring until smooth.
- Prepare the Cups: Line a muffin tin with cupcake liners. Use a spoon to coat the bottom of each liner with melted chocolate (about 1 tablespoon each) and place it in the fridge to set for 10 minutes.
- Make the Filling: While the chocolate sets, mix the creamy peanut butter, powdered sugar, and softened butter in a bowl until smooth and fully combined.
- Add the Filling: Once the chocolate layer has set, spoon a dollop of the peanut butter mixture into each cup, smoothing it out evenly.
- Top It Off: Melt the remaining chocolate and cover the peanut butter layer with it, ensuring a full seal.
- Chill: Refrigerate for another 30-40 minutes until fully set.
- Enjoy: Remove from the fridge, peel off the liners, and enjoy your homemade peanut butter cups!
Best Ways to Enjoy It
These Halloween Peanut Butter Cups are delightful on their own, but you can also jazz them up for serving! Consider pairing them with a scoop of vanilla ice cream for a delicious sundae. If you’re feeling festive, add some Halloween-themed sprinkles on top before the chocolate sets. To create a centerpiece on your snack table, arrange them on a platter with some dried fruits or nuts for a colorful contrast.
Keeping Leftovers Fresh
To keep your Peanut Butter Cups tasting their best, store them in an airtight container at room temperature for up to a week. If your house is warm, you may want to refrigerate them to prevent the chocolate from melting. For longer storage, you can freeze them for up to three months. Just ensure they are well-wrapped to avoid freezer burn.
Helpful Cooking Tips
For the best results, here are a few pro tips to keep in mind:
- Chocolate Melting: Be careful not to overheat the chocolate; heat it gently and stir often.
- Peanut Butter Consistency: Use creamy peanut butter for the smoothest texture, but if you love crunch, feel free to mix in some chunky peanut butter.
- Layering Technique: Ensure each layer is set before adding the next. This helps maintain the distinct layers and prevents mixing.
Creative Twists
Once you’ve mastered the classic version of Halloween Peanut Butter Cups, you can get creative! Try adding crushed pretzels for a salty crunch, or sprinkle a bit of sea salt on top for a delightful contrast. You could also experiment with flavored chocolates, like raspberry or mint, to create exciting variations that cater to different taste buds.
Your Questions Answered
Q: How long does it take to make these peanut butter cups?
A: The entire process takes about 25 minutes, not including set time, so plan for about an hour for everything to chill.
Q: Can I substitute the peanut butter?
A: Absolutely! Almond butter or even sunflower seed butter works wonderfully for allergy-friendly alternatives.
Q: How do I store these treats?
A: Keep them in an airtight container at room temperature for up to a week, or freeze them for longer storage.
Now that you know how to make these delightful Halloween Peanut Butter Cups, it’s time to get cooking! Enjoy the process, involve your family, and savor the joy of homemade treats that everyone will love. Happy Halloween!

Halloween Peanut Butter Cups
Ingredients
Method
- In a microwave-safe bowl, melt about half of your chocolate chips in 30-second increments, stirring until smooth.
- Line a muffin tin with cupcake liners. Use a spoon to coat the bottom of each liner with melted chocolate (about 1 tablespoon each) and place it in the fridge to set for 10 minutes.
- While the chocolate sets, mix the creamy peanut butter, powdered sugar, and softened butter in a bowl until smooth and fully combined.
- Once the chocolate layer has set, spoon a dollop of the peanut butter mixture into each cup, smoothing it out evenly.
- Melt the remaining chocolate and cover the peanut butter layer with it, ensuring a full seal.
- Refrigerate for another 30-40 minutes until fully set.
- Remove from the fridge, peel off the liners, and enjoy your homemade peanut butter cups!

