Red Velvet Cake Pops
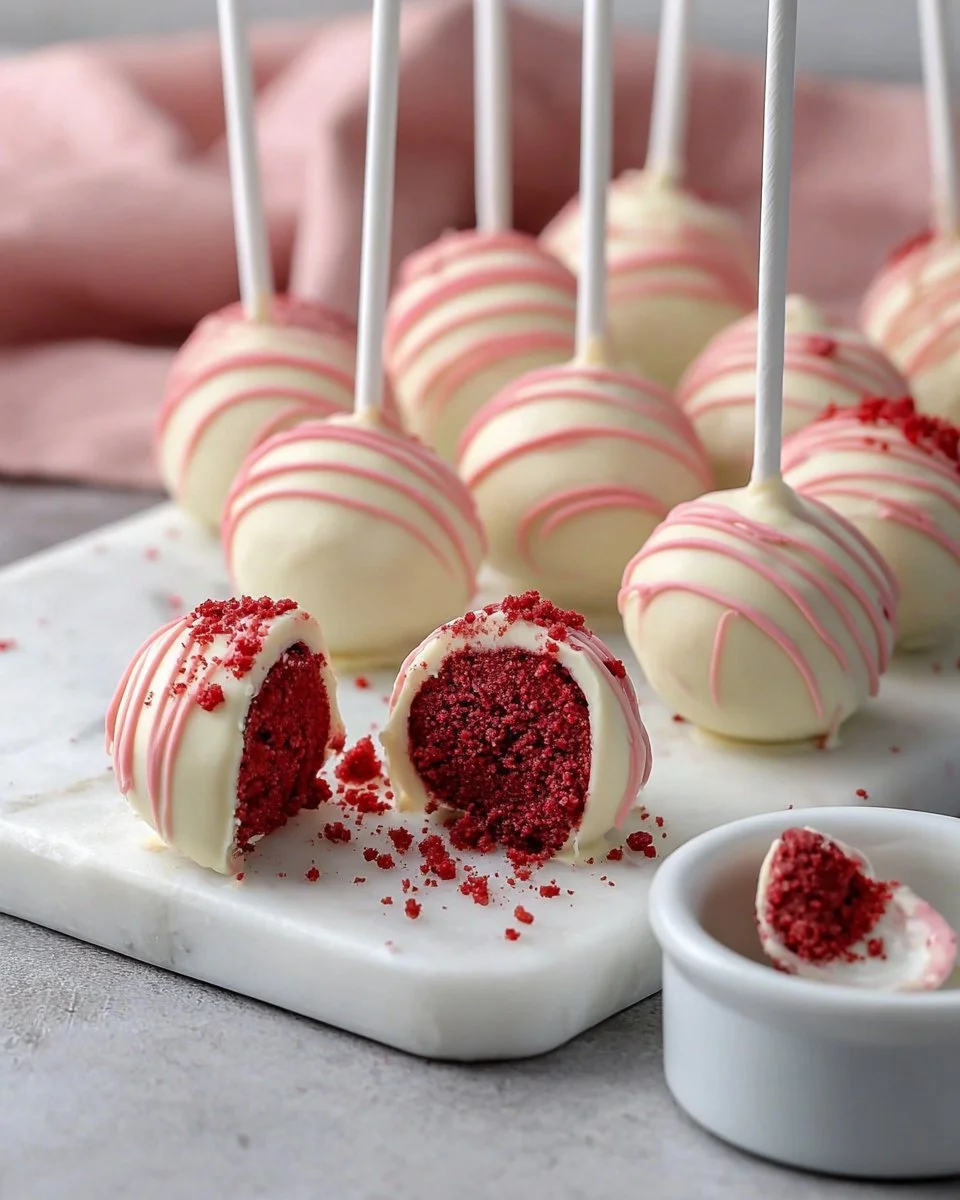

Red Velvet Cake Pops are a delightful treat that brings the classic charm of a layer cake into a fun, bite-sized form. These vibrant, red-hued pops are often the centerpiece of celebrations, from birthdays to holiday gatherings. To me, there’s something special about savoring a cake pop—a perfect blend of moist cake and rich cream cheese frosting, all beautifully coated in white chocolate. They not only look gorgeous but also provide a sweet indulgence that appeals to both kids and adults alike. Whether you’re celebrating or just in the mood for a sweet snack, these cake pops are perfect for any occasion.
Reasons to Try This Red Velvet Delight
Making Red Velvet Cake Pops at home isn’t just about satisfying a sweet tooth; it’s about creating something extraordinary. These treats are budget-friendly and surprisingly easy to make, which means you won’t have to break the bank to impress your guests or enjoy a sweet weekend project with the kids. Their festive appearance makes them ideal for bridal showers, parties, or any holiday gathering, and the flavor is undoubtedly kid-approved!
"These cake pops were a hit at my daughter’s birthday party! Everyone loved the moist cake and the delicious coating—definitely making them again!" – Sarah T.
Preparing Red Velvet Cake Pops Recipe
Creating your very own red velvet cake pops is simple and straightforward. The process begins with baking a luscious red velvet cake, then crumbling it to mix in a luxurious cream cheese frosting. After rolling the mixture into balls and refrigerating them, they’re dipped in white chocolate—a trick that adds both beauty and flavor to these scrumptious bites. What’s great is that you can easily follow along with these clear steps to recreate this delight.
What You’ll Need
Gathering the right ingredients is key to making delicious Red Velvet Cake Pops. Here’s what you’ll need for this recipe:
For the Cake:
- 1 1/2 cups all-purpose flour
- 1 cup granulated sugar
- 1 tablespoon cocoa powder
- 1/2 teaspoon baking soda
- 1/4 teaspoon salt
- 1 large egg
- 1 cup buttermilk
- 1 tablespoon red food coloring
- 1 teaspoon vanilla extract
- 1/2 cup vegetable oil
For the Frosting:
- 8 ounces cream cheese, softened
- 1/4 cup unsalted butter, softened
- 2 cups powdered sugar
- 1 teaspoon vanilla extract
Coating:
- 12 ounces white chocolate or candy melts
- Sprinkles or decorations (optional)
Make sure to have all these ingredients ready to ensure a smooth baking process. If you’re looking for substitutions, consider using dairy-free butter or cream cheese for a dairy-free option, or almond extract for a unique flavor twist!
Step-by-Step Instructions
- Preheat the Oven: Set your oven to 350°F (175°C). Prepare a 9-inch round cake pan by greasing and flouring it.
- Mix Dry Ingredients: In a large mixing bowl, whisk together the flour, granulated sugar, cocoa powder, baking soda, and salt until well combined.
- Combine Wet Ingredients: In a separate bowl, mix the egg, buttermilk, red food coloring, vanilla extract, and vegetable oil until smooth.
- Combine Miaxtures: Add the wet mixture into the dry ingredients and stir until the batter is smooth.
- Bake the Cake: Pour the batter into the prepared pan and bake for 25-30 minutes or until a toothpick comes out clean. Let it cool completely on a wire rack.
- Crumble: Once cooled, crumble the cake into a large bowl to prepare for mixing with the frosting.
- Make the Frosting: In another bowl, mix the softened cream cheese, unsalted butter, powdered sugar, and vanilla extract to create a smooth frosting.
- Combine Cake and Frosting: Stir the frosting into the crumbled cake until everything holds together well. Roll this mixture into 1-inch balls and place them on a parchment-lined baking sheet.
- Chill the Cake Balls: Refrigerate the cake balls for at least 1 hour to firm up.
- Melt Chocolate: While they chill, melt the white chocolate or candy melts according to package instructions.
- Dip & Decorate: Dip each cake ball into the melted coating and place it back on parchment. Add sprinkles or decorative toppings while the coating is still wet. Allow them to cool and set completely before serving.
Best Ways to Enjoy Red Velvet Cake Pops
When it comes to serving Red Velvet Cake Pops, the presentation can be as fun as the flavors! You might consider placing them in decorative cupcake liners or arranging them in a cake pop stand for an eye-catching display. You could serve them alongside a scoop of vanilla ice cream or a rich chocolate mousse for a dessert feast.
Keeping Leftovers Fresh


If you happen to have any leftover cake pops (though that’s rare!), here’s how to store them properly. Place them in an airtight container and keep them in the refrigerator for up to a week. For longer storage, you can freeze them—just make sure they’re well-wrapped to avoid freezer burn.
Pro Chef Tips
To take your baking to a new level, here are a few tips:
- Cooling Time: Ensure that your cake is completely cooled before crumbling it. This keeps the cake crumbs from becoming too wet.
- Consistency Matters: If your cake mixture feels too dry while forming balls, a teaspoon of additional frosting can help get the ideal texture.
- Dipping Techniques: Using a fork or a dipping tool can help keep your hands clean while coating the cake pops in chocolate.
Creative Twists
Feel free to experiment with flavors and coatings! You could try different colorings for the cake or use dark chocolate melts instead of white for a richer flavor. Consider adding different toppers, such as crushed nuts, flavored sprinkles, or even coconut flakes!
Your Questions Answered
What is the prep time for these cake pops?
Preparation may take about 20 minutes, but don’t forget the chilling time of at least 1 hour afterward!Can I substitute any of the ingredients?
Absolutely! You can use gluten-free flour for a gluten-free version or dairy alternatives for a lactose-free option.How long can I store these cake pops?
They stay fresh in the refrigerator for about a week. You can also freeze them for up to three months—just remember to store them in an airtight container!
With these tips and insights, you’ll be well-equipped to make scrumptious Red Velvet Cake Pops that are sure to impress. Happy baking!


Red Velvet Cake Pops
Ingredients
Method
- Preheat the Oven: Set your oven to 350°F (175°C). Prepare a 9-inch round cake pan by greasing and flouring it.
- Mix Dry Ingredients: In a large mixing bowl, whisk together the flour, granulated sugar, cocoa powder, baking soda, and salt until well combined.
- Combine Wet Ingredients: In a separate bowl, mix the egg, buttermilk, red food coloring, vanilla extract, and vegetable oil until smooth.
- Combine Mixtures: Add the wet mixture into the dry ingredients and stir until the batter is smooth.
- Bake the Cake: Pour the batter into the prepared pan and bake for 25-30 minutes or until a toothpick comes out clean. Let it cool completely on a wire rack.
- Crumble: Once cooled, crumble the cake into a large bowl to prepare for mixing with the frosting.
- Make the Frosting: In another bowl, mix the softened cream cheese, unsalted butter, powdered sugar, and vanilla extract to create a smooth frosting.
- Combine Cake and Frosting: Stir the frosting into the crumbled cake until everything holds together well. Roll this mixture into 1-inch balls and place them on a parchment-lined baking sheet.
- Chill the Cake Balls: Refrigerate the cake balls for at least 1 hour to firm up.
- Melt Chocolate: While they chill, melt the white chocolate or candy melts according to package instructions.
- Dip & Decorate: Dip each cake ball into the melted coating and place it back on parchment. Add sprinkles or decorative toppings while the coating is still wet. Allow them to cool and set completely before serving.

