Classic Beef Rissoles
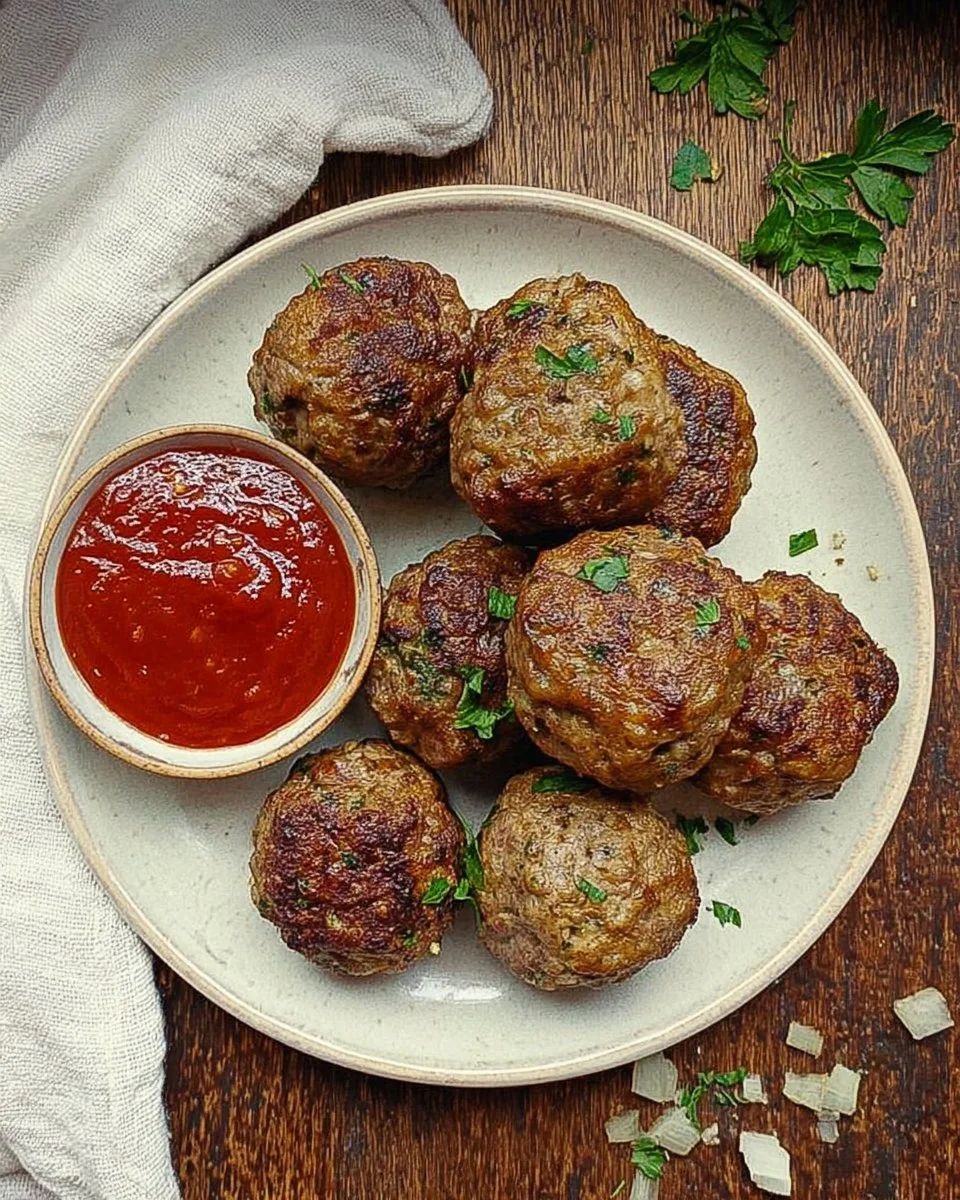

Classic Beef Rissoles: A Comfort Food Delight
Nothing beats the heartwarming aroma of Classic Beef Rissoles sizzling in a pan. This timeless dish combines the rich flavors of beef with a few simple ingredients, making it the perfect solution for a quick weeknight dinner or an inviting family gathering. Having whipped up these rissoles numerous times, I can assure you they are not just a meal; they’re a celebration of taste that brings people together around the dinner table.
Why you’ll love this dish
Classic Beef Rissoles are all about simplicity and satisfaction. They come together quickly, are easy on the wallet, and are guaranteed to be a hit with both kids and adults alike. Ideal for those bustling weeknights when time is tight, yet you crave something hearty, these rissoles truly shine. What’s more, they are versatile; you can enjoy them solo, in sandwiches, or as part of a larger feast.
"Made these for dinner last night, and my kids gobbled them up! So easy to whip up, and they tasted fantastic. Will definitely make them again!" – Jane D.
Step-by-step overview
Creating your Classic Beef Rissoles is a breeze, and this guide will walk you through the process, ensuring you have a delightful dish at the end. First, you’ll combine the ingredients, form the patties, chill them to firm up, and then sear them in a hot pan until they’re crispy and golden. It’s a straightforward method that will make you feel like a culinary expert in no time!
What you’ll need
Gather these items for a delicious outcome:
- 500g beef mince
- 2 eggs
- 1/4 cup breadcrumbs
- 2 tbsp parmesan cheese, grated
- 2 tbsp Worcestershire sauce
- 2 tbsp caramelised onions
- 2 tsp garlic paste
- 1 tsp dried parsley
- 1 tsp beef stock paste
- Salt and pepper, to taste
- Olive oil, for cooking
Feel free to mix and match! For instance, if you’re out of beef mince, try using chicken or turkey mince instead for a leaner option.
Step-by-step instructions
In a large mixing bowl, combine all your ingredients. Use your hands to mix everything until well combined – don’t be afraid to get a bit messy!
Shape the mixture into balls and then flatten them slightly to create rissole shapes. This helps them cook evenly.
Place your shaped rissoles on a tray and pop them in the fridge for about 30 minutes. This firming step is crucial for maintaining shape during cooking.
Heat a thin layer of olive oil in a large frying pan over medium-high heat. Make sure it’s hot before adding your rissoles.
Cook the rissoles in small batches, turning them once, until they’re golden brown on both sides and cooked through. This should take about 4–5 minutes per side, depending on their thickness.
Best ways to enjoy it
These rissoles can be served in numerous delightful ways! Try them in a fresh burger bun with lettuce, tomato, and your favorite sauce for a hearty meal. Pair them with creamy mashed potatoes and steamed vegetables for a comforting dinner. Don’t forget to drizzle with a bit of gravy or serve with a side of tangy coleslaw for a classic touch.
Storage and reheating tips
To keep your Classic Beef Rissoles fresh, store any leftovers in an airtight container in the refrigerator for up to three days. If you want to prepare them ahead of time, these rissoles freeze beautifully! Once formed, place them in a freezer bag or airtight container, and they’ll be good for up to three months. When ready to enjoy, simply thaw and cook directly from frozen – just add a few extra minutes to the cooking time.
Helpful cooking tips
- Make sure to season generously; salt and pepper can elevate these rissoles significantly.
- For added flavor, consider incorporating spices such as paprika or cumin to the meat mixture.
- If your rissoles are falling apart, try adding a touch more breadcrumbs or an additional egg to bind them better.
Creative twists
Feel like mixing things up? You can easily add some finely chopped veggies like zucchini or bell peppers to the meat mixture for extra nutrition. Consider swapping out the parmesan for feta for a Mediterranean flair, or try a mix of herbs like oregano and thyme for an exciting flavor profile. For a decadent twist, top your rissoles with melted cheese during the last few minutes of cooking.
FAQ
How long does this recipe take?
Preparation takes about 15-20 minutes, plus a 30-minute chilling time. Cooking should take around 10 minutes in total, making this a quick dinner option!
Can I use ground chicken or turkey instead of beef?
Absolutely! Ground chicken or turkey are great lean alternatives that can work beautifully in this recipe.
How do I know if my rissoles are cooked through?
The easiest way is to use a meat thermometer; they should reach an internal temperature of 75°C (165°F). Alternatively, cutting one in half to check that it’s no longer pink in the center is a reliable method.
With its unbeatable combination of flavor, simplicity, and versatility, Classic Beef Rissoles are sure to become a staple in your kitchen. So why not gather some ingredients and give this delightful dish a try? Your tastebuds will thank you!


Classic Beef Rissoles
Ingredients
Method
- In a large mixing bowl, combine all your ingredients. Use your hands to mix everything until well combined.
- Shape the mixture into balls and then flatten them slightly to create rissole shapes.
- Place your shaped rissoles on a tray and pop them in the fridge for about 30 minutes.
- Heat a thin layer of olive oil in a large frying pan over medium-high heat.
- Cook the rissoles in small batches, turning them once, until they’re golden brown on both sides and cooked through, about 4–5 minutes per side.
Nutrition
Notes


